

Beer Foam
We’ve all seen the server or bartender go through the painstaking process of slowly pouring beer from the faucet or out of a can or bottle into a nearly-horizontal glass, making every effort to not allow any foam to show up at the top of the glass. However, every brewer will tell you that foam is an important characteristic of beer that is supposed to be there. In some countries there is a clear line below the top of the glass, highlighting the level of liquid that you paid for (with room for foam on top). In other countries the liquid is meant to be held together by surface tension at the brim of the glass without a trace of foam.
In this post I won’t be sharing about how much foam each pint should have, but I will share some ways that brewers can improve foam in their beer. Particularly, I’ll share some takeaways from Dr. Charles Bamforth’s 2012 book, Foam, from the ASBC “Quality Series”.
Why does foam form?
One characteristic that all beers have is carbonation, which is forced into the beer before packaging at a level of around 5 g/L (2.5 volumes of CO2). The amount of carbon dioxide that a liquid can hold is directly related to the temperature of the liquid (colder liquids hold more gas) as well as the pressure at the surface of the liquid (higher pressure is able to force more gas down into the liquid). Even water at room temperature in a 100% CO2 environment would reach equilibrium by absorbing 0.9 mL of gas per mL of water. This is equivalent to 0.9 “volumes of CO2” as carbonation is typically discussed, or 1.8 g/L in terms of the mass of the gas dissolved, in grams, per liter of liquid.
Carbonated beverages are considered to be “supersaturated solutions of CO2” which are only held stable due to bottle caps or lids being applied to the top of the package. You could say that the pressure on top of the liquid is holding the gas in the liquid. As soon as a bottle or can is opened, or if a tap is opened to pour into a glass, the carbonation wants to escape the liquid and rise to the surface. That’s why you’ll see a stream of bubbles rising to the top of a glass or bottle. The gas inside the beer will form bubbles due to “nucleation" sites such as scratches, preformed microbubbles or insoluble particles in beer. Foam forms at the top of a glass of beer because of the bubbles reaching the surface of the glass and forming several layers that slow the transfer of the gas to the atmosphere. The bubbles “beading” from the bottom of the glass to the surface will continue to replenish the head by adding more layers of foam
So why is it that some beers have foam that lasts much longer than others? In general, when the foam has very small, uniform bubbles then the beer will have the greatest foam stability since there will be more layers to collapse and the liquid will drain very slowly back down into the beer. This is why nitrogenated beers (aka “on nitro”) have those thick, creamy heads that last much longer than carbonated beers - much smaller nitrogen bubbles. In the next section we’ll look at foam-stabilizing and foam-destabilizing materials.

A nice Irish Red Ale with a touch of nitrogen on the dispense makes for a smooth finish and a thick, creamy head that lasts through until the last sip.
Foam-stabilizing materials
While the gas inside the bubbles is carbon dioxide (or nitrogen), the bubble walls are made of “beer”. But what’s in the beer that helps to make the bubbles more stable? In particular, there are a few components from malt and hops that stabilize beer foam.
Proteins (polypeptides)
Besides fermentable sugars, malted barley also provides several different proteins that help to stabilize the walls of foam bubbles to give a longer-lasting beer “head”. Specifically, protein Z (most abundant), lipid transfer proteins (LTP), hordeins (alcohol-soluble proteins) and albumins (water-soluble proteins) all contribute to greater foam stability. Other malts, such as wheat, that are known to have higher amounts of protein may also lead to foam stability.
Unfortunately wort boiling tends to denature the proteins in the wort, thus making them less soluble, which means that they precipitate out (e.g. “hot break”) and are left behind in the kettle. That’s great for the final clarity of the beer, but takes away from the foam stability.
bitter acids and divalent cations
When hops are boiled in the kettle the bitter alpha acids from the hops are isomerized into a more soluble form (iso-alpha acids). This is basically what is meant by the IBU (international bitterness unit) which is mg/L of iso-alpha acids dissolved into wort. These iso-alpha acids have hydrophobic side chains that interact with polypeptides (proteins) in the bubble walls which converts them into a quasi-solid and gives the foam its “lacing” properties that’s seen on the glass as it is consumed. So “yes”, hoppy beers should support more foam.
Some breweries regularly use downstream hop products for post-fermentation bittering. These products, known as “tetra” or “hexa”, are much more hydrophobic and, therefore, much more foam stabilizing than the iso-alpha acids. The presence of divalent cations such as Zn (zinc) in the wort also improve foam stability.

The hoppy pale ales and IPAs should have no problem maintaining a decent head. In this photo you can also see the “beading”, or stream of bubbles rising to the surface to replenish the collapsing foam.
maillard reaction products
When wort is boiled for longer periods of time (over 60 minutes), the heating condenses the wort through evaporation and also cooks the sugars in the wort, converting them into darker, more caramel/honey/toffee-like compounds. These maillard reaction products involve the linking of amino compounds (building blocks of proteins) with carbohydrates (sugars) due to heating, and are also foam-stabilizing.
propylene glycol alginate (pga)
On the cold side of the brewery, additives such as PGA may be added to the beer to encourage electrostatic interactions with polypeptides. This, in turn, increases the viscosity of the beer which means that the liquid in the foam takes longer to drain back into the glass, thus collapsing the head. This derivative of kelp is added after filtration.
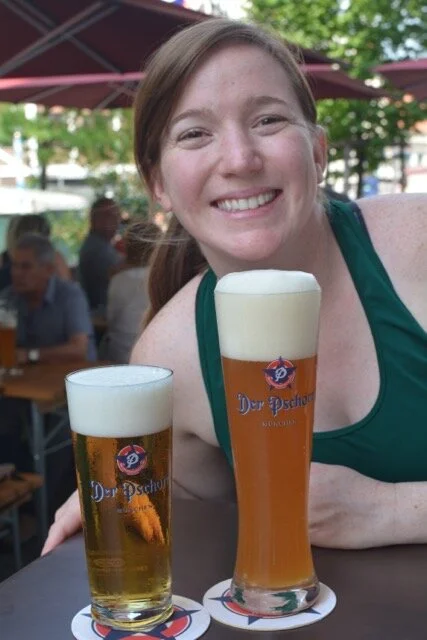
Generous amounts of wheat malt, as in the hefeweizen on the right, is a sure-fire way to boost head retention due to the protein content.
Foam de-stabilizing materials
Detergents and lipids both compete with proteins and bitter acids, thus working to collapse those foam bubbles. An interesting culinary example of this is in making meringue from egg whites. The whites (protein) must be whipped only after the yolk (fat) has been removed. This is why glassware must be sufficiently rinsed after washing so that a soapy glass doesn’t destroy the foam. As for lipids, a brewer should avoid using ingredients that contain them, such as chocolate or nuts. By all means, brew that chocolate hazelnut stout, but either go with cacao nibs and extracts or expect to have a short-lasting head on the beer. I suppose this confirms the age-old trick of getting rid of foam at the top of the glass by wiping your finger across your nose and using the oils to crash the layers of foam - gross, but it works if you’re into it.
Alcohol also tends to de-stabilize foam, so higher ABV beers have difficulty in supporting a thick head.
How is beer foam influenced throughout the brewing process?
So now with the bases covered on what materials influence beer foam stability, let’s take a look at the brewing process to identify some habits that can promote beer foam.
grist
Proteins and melanoidins are foam-positive materials that should be included the grist. An all-malt beer should have plenty of protein, but wheat can always be used to boost that protein content. Melanoidins are formed during malt kilning,where more highly-kilned malt will contain higher concentrations of these compounds. Adjunct brewers using corn, rice and sugars are diluting the protein content of their grist, so can expect reduced foam-stability.
mash
Lower-temperature mash rests will tend to break down foam-stabilizing proteins, so stick with higher temp (64-68 C) saccharification rests only. Shoot for a mash pH of 5.1 and remember that higher-gravity brews will have reduced foam stability.
lauter
Aim to lauter wort as clear as possible in order to yield a wort with lower levels of lipids.
boil
Longer boils will denature more proteins, causing them to settle out in the kettle and ultimately reduce foam-stability.
hops
Remember that more IBUs in the wort promote foam-stability and post-fermentation bittering products (e.g. tetra & hexa) are even better.
fermentation/conditioning
In terms of fermentation, it has been demonstrated that the more stressed the yeast, the worse the beer foam will be. It’s best to maintain a healthy fermentation for whatever strain you are using and to separate green beer from the yeast as early as possible.
post-filtration
For bright beer (filtered or centrifuged) several foam stabilizers may be added such as PGA at 50 ppm, Zn at 2 ppm (in the form of zinc chloride), and of course, nitrogen into kegged beer at a rate of at least 15-20 ppm.
dispensing
On the serving end, kegs should be stored at 1-3 C and dispensed at 3-5.5 C. One of several factors that lead to foamy beer coming out of the faucet is that the kegs haven’t been kept cold enough. Remember that lower temperatures allow the liquid to hold more carbonation. As the beer warms up then the gas is more easily expelled, thus foaming when it hits the atmosphere from the tap.

“Lacing Out”! It’s a beautiful thing to see foam “lacing” remain on the walls of the glass while putting one of these bad boys away.
So, that should give you an idea of trouble-shooting the foam of your beer. Don’t be afraid to pour those pints with a little vigor to make sure that the foam is as prominent as it should be, and that you are able to enjoy a little bit of foam with every sip!